

Quick answer: X-Bow 3.0 wins by placing X-Bow at the bridge center tile, locking it onto the enemy tower, and protecting it with Tesla (air defense behind) and Ice Golem (damage sponge in front). A locked X-Bow deals about 143 DPS at Tournament Standard (43 damage every 0.3s) and destroys a 3,052 HP crown tower in roughly 21 seconds if uncontested.
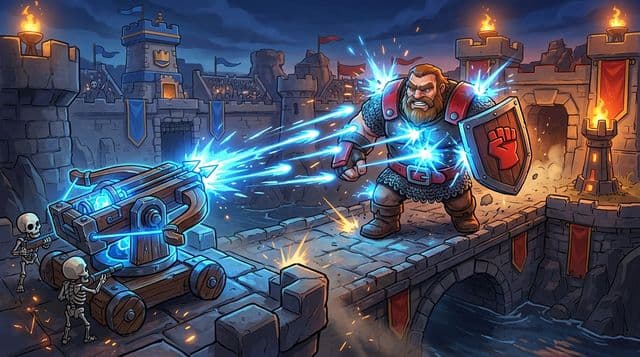
X-Bow 3.0 is one of the most skill-expressive decks in Clash Royale and one of the best choices for climbing from 5000 to 8000 trophies in 2026. Its defensive backbone is the Tesla box, and Tesla's current profile is the one set by the June 1, 2026 balance pass: 1,182 hitpoints at Tournament Standard and a 25-second lifetime, cut from 30. The shorter lifetime is the constraint that shapes everything below — the box runs on a clock, so X-Bow placements have to be timed against Tesla's remaining seconds rather than treated as permanent cover.
X-Bow 3.0 scales better than almost any other deck above 5000 trophies for one structural reason: opponents at mid-ladder have diverse but imperfect counters. They might know that Rocket counters X-Bow, but they may not know the exact tile positions that move the X-Bow outside Rocket range. They might know that Inferno Tower kills X-Bow, but they may not know that Ice Golem kiting removes Inferno Dragon from Inferno Tower. These knowledge gaps compound across a match and produce wins for the X-Bow player who executes the fundamentals described in this guide.
The Full Deck: Cards, Roles, and Synergies
The standard X-Bow 3.0 deck for 2026: X-Bow, Tesla, The Log, Skeletons, Ice Spirit, Ice Golem, Arrows, Barbarian Barrel.
Average elixir cost: 2.6 per card (21 elixir across the eight cards). This is one of the cheapest decks in the game. The low average cost means you cycle through it faster than almost any opponent, giving X-Bow 3.0 extraordinary consistency in returning to its win condition.
X-Bow (6 elixir) is the win condition. It fires every 0.3 seconds for 43 damage at Tournament Standard — about 143 DPS — at ground targets only, out to 11.5 tiles. That range is the whole card: it is why a bridge placement reaches the enemy tower at all, and why the X-Bow can never answer a Balloon or a Minion Horde on its own. A locked X-Bow destroys a 3,052 HP crown tower in roughly 21 seconds. It has 1,600 HP at Level 11 — relatively fragile for its cost — which is why every other card in the deck exists to protect it.
Tesla (4 elixir) is the primary defensive building and X-Bow's air shield. Placed directly behind the X-Bow, Tesla targets aerial threats (Balloon, Minion Horde, Bats) that X-Bow cannot hit. It also handles ground support troops (Musketeer, Wizard) that try to attack X-Bow from range. Tesla's Tournament Standard profile after the June 1, 2026 balance pass is 1,182 hitpoints and a 25-second lifetime. A Rocket deals 1,485 at the same level, so Tesla does not tank a direct one — the positioning rules below exist precisely because raw hitpoints will not save it.
The Log (2 elixir) is your primary swarm-clear spell. Skeletons, Goblins, Bats, and Minions all die to The Log. It also pushes back troops that are walking toward your X-Bow, buying 1-2 seconds of buffer time. Never use The Log speculatively — always hold it for must-answer threats.
Skeletons (1 elixir) are your cheapest cycle card and a surprisingly effective defensive tool. Three skeletons can distract a Prince or Mini P.E.K.K.A for 3 seconds, kite a Giant 2 tiles out of position, or force an opponent to use a spell on a 1-elixir card. At 1 elixir, they represent the best elixir-per-distraction value in the game.
Ice Spirit (1 elixir) is the deck's other 1-elixir card and one of the most versatile cards in Clash Royale. Ice Spirit freezes all enemies in a small radius for 1.1 seconds. Against a Hog Rider approaching your X-Bow, Ice Spirit freezes it long enough for Tesla to lock on and deal 2 shots of damage. Against a Minion Horde, Ice Spirit freezes them and Arrows finishes them. Against an Inferno Dragon resetting your Tesla beam, Ice Spirit freeze plus The Log push-back creates 3 seconds of full X-Bow lock time.
Ice Golem (2 elixir) is X-Bow 3.0's damage absorption specialist. He has 1,315 HP at Level 11 and costs only 2 elixir. His Death Nova is a slow, not a freeze: everything within 2 tiles moves and attacks 30% slower for 2 seconds. Placed directly in front of the X-Bow, Ice Golem absorbs hits from every ground troop walking toward the X-Bow and then drags their damage output down for 2 seconds after he dies. The nova is most valuable against grouped push troops (Dark Prince, Mini P.E.K.K.A + support), where a 30% cut applied to several units at once adds up.
Arrows (3 elixir) is your air-swarm clearer and anti-Princess spell. Minion Horde, Bats, and a well-positioned Princess all threaten X-Bow's airspace. Arrows kills all of them cleanly. Do not use Arrows on ground troops — The Log handles those. Save Arrows specifically for air swarms and Princess.
Barbarian Barrel (2 elixir) rolls through lanes dealing 191 ground damage at Level 11 and spawning a Barbarian on impact. It is primarily your Goblin Barrel counter and your secondary spell against small ground troops when The Log is cycling. The Barbarian that spawns adds 2-3 seconds of defensive value after the roll.
Want this kind of analysis for your own deck?
TrophyCoach reads your battle log and writes a personalized action plan against the current meta — free to start.
X-Bow Placement: The Bridge-Lock Position
The X-Bow must be placed at the bridge for maximum effectiveness. Specifically: center tile of the river's edge on your side, 0 tiles from the river. This is the bridge-lock position.
At the bridge-lock position, the X-Bow's 11.5-tile range reaches the enemy crown tower immediately upon placement. From the moment it activates, it is dealing damage to the tower with no positioning delay. Any placement further back from the bridge reduces the X-Bow's damage window — at 1 tile back from the river, the X-Bow's range just reaches the tower, but the angle is shallower and some DPS is lost to tower collision geometry.
The center tile (not left or right of center) is important because it gives Tesla, placed directly behind the X-Bow, the widest possible coverage angle for air defense. An off-center X-Bow creates blind spots in Tesla's coverage.
The X-Bow Box Formation
The defensive structure that X-Bow 3.0 builds is called the X-Bow Box:
- X-Bow at center bridge, 0 tiles from river
- Tesla at center, 2 tiles behind X-Bow
- Ice Golem placed directly in front of X-Bow (between X-Bow and the river)
This three-card formation creates overlapping defensive coverage. X-Bow hits ground targets out to 11.5 tiles. Tesla covers air threats behind the X-Bow and targets ground troops within 5.5 tiles. Ice Golem absorbs the first 3-4 hits from any incoming ground push.
Tesla's 25-second lifetime, cut from 30 on June 1, 2026, puts a hard clock on this box: rebuild it on schedule rather than assuming the formation is still standing behind your X-Bow.
Tesla Positioning: The 2-Tile Rule
Tesla must always be placed exactly 2 tiles directly behind X-Bow. This positioning rule is non-negotiable.
If Tesla is placed 1 tile behind X-Bow, it is within the splash radius of a Fireball or Rocket centered on the X-Bow. A single Rocket (6 elixir) will deal massive damage to both the X-Bow and Tesla simultaneously, potentially destroying both in one hit. The 2-tile separation ensures that a Rocket centered on X-Bow is not also centered on Tesla, so the opponent has to choose which of the two he is actually paying 6 elixir to kill.
If Tesla is placed 3+ tiles behind X-Bow, it loses coverage of troops that walk up directly behind the X-Bow (Mega Minion, Baby Dragon approaching from your side). At 2 tiles, Tesla's 5.5-tile range covers everything from directly behind the X-Bow to 7.5 tiles back — comprehensive coverage of the entire defensive zone.
When to Pre-Place Tesla vs. Wait
Pre-place Tesla in the ground (off) before placing X-Bow in most situations. This means: place Tesla first, then X-Bow 2 tiles in front of it. The Tesla activates automatically when an enemy enters range.
Wait to place Tesla when you suspect the opponent has Earthquake and might use it on a visible building. Against EQ Hog 2.6, place X-Bow first, let the opponent EQ it or commit to a push, then place Tesla. This forces them to choose between two targets and often results in the EQ being poorly timed.
Ice Golem Kiting: The Most Underused X-Bow Technique
Ice Golem kiting is the most important advanced technique in X-Bow 3.0 and the technique that separates players who plateau at 5500 from those who push to 7500+.
The core idea: Ice Golem, when placed in a specific position, will attract the attention of multiple enemy troops and walk them away from your X-Bow. The "kiting" refers to leading the troops on a path that wastes their time and your opponent's elixir.
The Inferno Dragon Kite
Against Inferno Dragon (the most dangerous single counter to X-Bow), place Ice Golem 2 tiles to the right of X-Bow and 1 tile toward the center of the map. The Inferno Dragon will redirect its beam from X-Bow to Ice Golem — the beam resets, meaning it must build up damage again on the new target. Ice Golem absorbs the Inferno beam, dies in 5-6 seconds, and leaves a 2-second, 30% slow on the Inferno Dragon — it keeps attacking, just slower, so the value is the retarget and the beam reset, not a stop. Across Ice Golem's lifespan plus that slow window, X-Bow has been hitting the enemy tower for roughly 7 seconds, about 1,000 damage at 143 DPS, while Ice Golem cost only 2 elixir.
The critical timing: place Ice Golem exactly when the Inferno Dragon's beam begins to glow blue (maximum damage tier). At that moment, even 1 second of beam reset is worth the Ice Golem cost. If you place Ice Golem when the beam is at early/orange tier, you may not accomplish the reset and the Ice Golem sacrifice is wasted.
The P.E.K.K.A Kite
Against P.E.K.K.A (7 elixir, 3500+ HP), a direct head-on defense is elixir-negative. Use Ice Golem + Skeletons to kite. Place Ice Golem 3 tiles to the side of the P.E.K.K.A's path, toward the side wall. P.E.K.K.A will redirect toward the Ice Golem. Then drop Skeletons on the opposite side of the P.E.K.K.A — the P.E.K.K.A can only attack in one direction at a time and will oscillate between targets. While it oscillates, your tower deals 4-5 shots of damage. After Ice Golem dies he slows the P.E.K.K.A by 30% for 2 seconds — it is still swinging, so do not treat the nova as a stop — then The Log pushes it back another tile and tower fire finishes it.
This defense uses 3 elixir total (2 Ice Golem + 1 Skeletons) against a 7-elixir card. The elixir trade is exceptional, and it leaves you with 4+ elixir immediately available to send X-Bow during the opponent's recovery window.
The Cycle Sequence: 8-Card Rotation for Maximum Pressure
X-Bow 3.0's strength comes from its cycle speed. A played card goes to the back of the 4-card queue and returns to hand after 4 more plays, so X-Bow never waits for all 21 elixir of the deck: hold Tesla, Arrows, and one 2-cost card, and loop X-Bow (6) with Skeletons, Ice Spirit, and two 2-elixir cards (1 + 1 + 2 + 2). That is a 12-elixir loop — X-Bow is back in hand after 6 elixir. Elixir regenerates at one per 2.8 seconds in single elixir and one per 1.4 seconds in double, so the fastest X-Bow-to-X-Bow loop is about 33.6 seconds before the 2:00 mark and 16.8 seconds after it. Those are ceilings: every elixir you spend defending pushes the next X-Bow back.
The Optimal Opening Sequence
Do not place X-Bow in the opening 30 seconds. Instead, cycle through cheap cards to identify the opponent's deck and generate elixir advantage. The ideal opening:
- Ice Spirit to the bridge (costs 1 elixir, identifies opponent's spell or defensive reaction)
- Skeletons in the back (1 elixir, continues cycling)
- Ice Golem in the back (2 elixir, builds toward X-Bow placement with full elixir)
At 30 seconds you are at 9-10 elixir. Tesla plus X-Bow is a 10-elixir bill, so from 9 you cannot play both back to back: Tesla leaves you at 5, and the X-Bow has to wait one elixir tick (about 2.8 seconds in single elixir) before it can go down — and it lands with an empty bar, not with 3 in reserve. Either hold for the full 10 so the pair goes down together, or accept the short gap and treat Ice Spirit and Skeletons as your only micro-defense until the bar refills.
Pre-staging Tesla is still better than sending a bare X-Bow at 6 elixir, because the X-Bow lands with air cover already in position. It is not, however, a way to skip the 10-elixir bill.
Defending While Maintaining X-Bow Pressure
The X-Bow 3.0 cycle rhythm during an active X-Bow lock:
- X-Bow placed and hitting tower
- Use Ice Spirit on any troop walking toward X-Bow (1 elixir, buys 1.1 seconds)
- Use The Log if swarm reaches X-Bow (2 elixir)
- Place Ice Golem in front of X-Bow if medium troop approaches (2 elixir)
- Tesla already covering air threats automatically
Total defensive spend per X-Bow placement: typically 3-5 elixir against a disorganized opponent, 5-8 elixir against a coordinated counter-push. The 6-elixir X-Bow investment pays off as long as it deals 700+ tower damage before being destroyed — which at 143 DPS takes about 5 seconds of uncontested lock.
Matchup Analysis: 10 Archetypes from 5000-8000
Matchup 1: vs Hog 2.6
Matchup verdict: favorable.
Hog 2.6 counters X-Bow with Earthquake (destroys buildings) and fast cycling. The key: do not pre-place Tesla before seeing their card commitments. Let them EQ your X-Bow, then rebuild with Tesla behind the second X-Bow. Each EQ costs them 3 elixir and restores your X-Bow to full placement rights — you win the attrition battle.
Ice Golem kites the Hog Rider away from your crown tower on defense. Skeletons add distraction. Counter-push with X-Bow immediately after defending each Hog push — the Hog player's Tesla (if they run it) is on the other side of the map and cannot defend.
Matchup 2: vs Graveyard Poison
Matchup verdict: roughly even, and the hardest of the even matchups.
Graveyard Poison's Tornado deactivates your X-Bow by pulling it out of position. Their Tombstone kites your Ice Golem. The matchup requires placing X-Bow only when you know their Tornado is cycling. Watch for Princess + Tornado usage — that is when X-Bow is safest.
Defensively, Ice Golem + Skeletons handles Knight and the Graveyard skeletons. Your X-Bow can target the Graveyard's Knight tank from across the map, reducing the tank's lifespan and limiting skeleton uptime.
Matchup 3: vs Miner Wall Breakers
Matchup verdict: slightly favorable.
Miner (3 elixir) surfaces on your X-Bow and can deal 700+ damage before dying to tower fire and Tesla. The counter: never leave X-Bow unprotected by Ice Golem when you suspect Miner is in hand. Ice Golem in front of X-Bow absorbs the Miner's hits and freezes Miner on death, giving your tower and Tesla time to kill it.
Wall Breakers target your Tesla if placed between the river and X-Bow. Pull Wall Breakers off path with Barbarian Barrel or Skeletons — they will redirect toward the troop instead of Tesla.
Matchup 4: vs Log Bait
Matchup verdict: favorable.
Log Bait's primary X-Bow counter is Inferno Tower. Ice Golem kiting handles Inferno Tower as described above. Their Goblin Barrel will be aimed at your X-Bow — Barbarian Barrel intercepts it if you catch the throw animation. The Log handles their Princess and Goblin Gang. Once Inferno Tower is destroyed, the lane is open for extended X-Bow lock time.
Matchup 5: vs Giant Beatdown
Matchup verdict: roughly even.
Giant Beatdown presents the hardest defense for X-Bow 3.0. A Giant with Mega Minion and Witch requires Tesla (air), Skeletons (distract), and Ice Golem (Giant kite) simultaneously — 7 elixir on defense against their 12+ elixir push. You survive the first push at elixir deficit, then punish with X-Bow during their rebuild phase (7-10 seconds of rebuild while Giant cycles back).
Key: place X-Bow immediately when the Giant push is defeated, before they can rebuild. A 10-second X-Bow lock during their rebuild phase is roughly 1,430 tower damage at 143 DPS — most of a tower's first half, and more than enough to take a significant lead.
Matchup 6: vs Balloon Cycle
Matchup verdict: slightly favorable.
Balloon (5 elixir) is your single hardest aerial threat to deal with. Tesla handles Balloon but requires 4 seconds of firing to kill it — during which Balloon has moved 3-4 tiles toward your tower. Place Tesla 2 tiles deeper than the X-Bow position when you suspect Balloon to maximize the firing window.
Arrows kills Balloon support (Bats, Minions) that would otherwise reset Tesla or distract it. Ice Spirit freeze on the Balloon itself buys the 1.1 seconds Tesla needs to get additional shots in.
Matchup 7: vs P.E.K.K.A Bridge Spam
Matchup verdict: unfavorable — the most difficult matchup in the list.
Bridge spam (P.E.K.K.A + Electro Wizard + Dark Prince + Bandit) applies multi-card pressure faster than X-Bow 3.0 can defend with its cheap cards. P.E.K.K.A needs Ice Golem + Skeletons kite. Electro Wizard resets Tesla and requires Barbarian Barrel or Arrows. Bandit's charge is stopped by Ice Golem placement in its path.
Against bridge spam, focus entirely on survival and chip damage. Do not try to establish X-Bow — instead, use X-Bow defensively (placed at your side of the river, targeting their troops) as a damage sponge and tower supporter. Sometimes X-Bow 3.0 wins the bridge spam matchup by out-surviving the opponent's burst and landing a counter X-Bow when they are at 0-2 elixir.
Matchup 8: vs Mortar Cycle
Matchup verdict: favorable.
Siege vs siege favors X-Bow because X-Bow does more DPS than Mortar. The matchup is determined by whose defensive structure survives longer. X-Bow + Tesla + Ice Golem is a more efficient box than Mortar + Tesla + Ice Spirit because X-Bow has higher DPS and Ice Golem is a better damage sponge than Ice Spirit.
Barbarian Barrel destroys Mortar's Skeletons and the spawned Barbarian adds bonus pressure. Place X-Bow on the lane opposite their Mortar to divide their defensive attention.
Matchup 9: vs 3 Musketeer
Matchup verdict: strongly favorable.
Three Musketeer decks are vulnerable to X-Bow because the 3 Musketeers cost 9 elixir and leave them at 0 elixir. That is the perfect X-Bow placement window — immediately when you see them commit 3 Musketeers to the back, place X-Bow at the bridge. They cannot respond for 6-7 seconds. The Log handles Skeletons they cycle to distract.
Matchup 10: vs Electro Giant
Matchup verdict: unfavorable.
Electro Giant's passive discharge resets Tesla's beam on every hit, negating its primary damage source. Ice Golem kiting is your best answer — lead the Electro Giant sideways while tower fire and Barbarian Barrel chip away at it. X-Bow placed during Electro Giant's kiting path deals consistent damage without being affected by the discharge (X-Bow targets buildings, and Electro Giant only resets troops/buildings targeting it at close range).
Want this kind of analysis for your own deck?
TrophyCoach reads your battle log and writes a personalized action plan against the current meta — free to start.
Emergency Scenarios: When Both Lanes Are Rushed
At 6500+ trophies, skilled opponents will occasionally rush both lanes simultaneously to overwhelm X-Bow 3.0's limited cheap defense. Here is the emergency protocol for each scenario.
Scenario 1: Hog Rider left lane + Balloon right lane. Ice Spirit freeze on the Hog Rider (right lane Tesla handles Balloon automatically). Skeletons on the Hog Rider while frozen. The Log on Hog Rider support troops if needed. You may take 200-300 damage on one tower, but you survive both threats without spending more than 4 elixir.
Scenario 2: Giant center + Minion Horde air. Arrows immediately on Minion Horde (3 elixir). Skeletons on Giant flank to kite. Ice Golem placed in Giant's path. Tesla covers any remaining air troops. This uses 6 elixir against a 10-12 elixir push — favorable trade that generates a massive counter-push window.
Scenario 3: Dual Hog pushes in double elixir. This is the hardest emergency. Both lanes have Hog Riders at the same time. Use Ice Golem on the higher-HP tower's lane (protect the more intact tower). Barbarian Barrel on the other lane to slow the second Hog. Tower fire + remaining Tesla shots handle whichever Hog gets through. You will take damage — the goal is to survive both threats with neither tower destroyed.
Double Elixir: The X-Bow 3.0 Advantage Multiplier
Double elixir beginning at 2:00 is where X-Bow 3.0 separates from most other decks. Elixir stops being the binding constraint — 12 elixir for two X-Bows arrives in about 17 seconds — and the card itself is back in hand after 4 more plays, so a second placement is possible after the 16.8-second loop (X-Bow plus 6 elixir of cycle cards).
The double elixir strategy:
If you are ahead: Place X-Bow at the bridge on the weaker lane and let it deal damage. Cycle defensively. At 60+ total elixir into double elixir, place a second X-Bow in the opposite lane. Now both towers are taking X-Bow fire simultaneously. The opponent must destroy two separate X-Bows to prevent damage — unlikely unless they have 8+ elixir in reserve.
If you are behind by one tower: Double elixir is your comeback window. Place X-Bow on the intact enemy tower lane (not the one you have been working on). While the opponent rushes your damaged tower, your X-Bow chips their intact tower. If both towers fall simultaneously, it is a draw — which is better than losing. Often, the opponent overcommits to protecting their X-Bow-targeted tower and leaves your damaged tower unfinished.
The second X-Bow timing: the earliest second X-Bow is about 16.8 seconds after the first in double elixir — 4 cheap plays plus 6 elixir for the X-Bow itself. Placing it while the first is still standing puts both on the tower at once for maximum pressure rather than sequentially.
Frequently Asked Questions
What is the hardest counter to X-Bow 3.0?
P.E.K.K.A with Electro Wizard support is the hardest counter. P.E.K.K.A has enough HP to reach and destroy X-Bow before your cheap defense kills it, and Electro Wizard resets both Tesla's beam and Ice Golem's freeze timing. The matchup is winnable but requires near-perfect defensive play.
Why does X-Bow 3.0 work better above 5000 than below?
Below 5000 trophies, opponents frequently have underpowered cards that cannot efficiently destroy X-Bow before it deals significant damage. But the main reason X-Bow 3.0 scales well is knowledge-based: opponents at mid-ladder know that Rocket or Inferno Tower counters X-Bow, but they do not know the exact tile adjustments that move X-Bow outside Rocket range or how Ice Golem defeats Inferno Tower's beam. These knowledge gaps widen as the skill baseline rises.
Should I use X-Bow defensively?
Yes, in two specific scenarios. First, against bridge spam decks where the opponent rushes your side immediately and you cannot afford to place X-Bow offensively. Place X-Bow 2 tiles behind the river on your side — it reaches their bridge-rushing ground troops well inside its 11.5-tile range and provides about 143 DPS of tower support (it cannot touch anything airborne). Second, as a counter-push deterrent after defending a large push. A defensively placed X-Bow forces the opponent to deal with it before rebuilding their offense.
What do I do if my X-Bow gets Earthquake'd immediately?
Earthquake costs 3 elixir and destroys X-Bow's HP by approximately 500 damage. If X-Bow survives (it has 1,600 HP at Level 11, so it survives one Earthquake), maintain the position with Ice Golem in front and Tesla behind. If Earthquake destroyed X-Bow, cycle cheaply until you have 10 elixir and place the second X-Bow in the opposite lane — they do not have another Earthquake ready for 9+ seconds.
How do I practice X-Bow 3.0 efficiently?
Focus the first 20 games entirely on the X-Bow Box formation: correct X-Bow placement, correct Tesla position, and Ice Golem kiting. Do not worry about winning or advanced reads. After 20 games with correct formation, spend the next 20 games on cycle tracking — knowing when your opponent's counter is cycled and placing X-Bow into those windows. Matchup-specific reads come naturally after the fundamentals are automatic.